Thursday, December 20, 2012

Christmas Tamales

I decided to make tamales for a Christmas party at work. I was going to being the chocolate peppermint cookies I made last week. I made twice as many as I needed for Christmas Under the Stars and froze the second half for the work party. However, my cookies were gone within about five minutes and since I blogged about them before bringing them, people wanted to try them and kept asking me where they were. So, Plan B, I brought the second half of the cookies to my Tuesday and Wednesday community groups and decided to make something new for the party.

In this situation, most people would find the quickest, easiest thing to make last minute, but what do I do? I decide to try something festive that I have never made before that takes all day - tamales! Why? I have no idea! I keep making things! Christmas is turning me into a machine. It is fun though, I love learning something new.

I made pork tamales and they were time consuming but not as bad as I thought. I was able to make the pork filling yesterday, it just cooked in the crock pot all day, so no big deal. And today I made the masa and assembled them. I turned on some Christmas music and my friend, Cheryl came over and helped me assemble. It is definitely more fun to assemble tamales with friends.

Here is the recipe:

Pork Tamales
Makes about 30 tamales

Pork Filling:

Ingredients:
1/3 cup cider vinegar
3 Tbs. lime juice
3 canned chipotle chiles
3 tsp. salt
1 ½ tsp. pepper
4 cloves minced garlic
3 tsp. cumin
1 tsp. Mexican oregano
1 tsp. coriander
1/2 tsp. cinnamon
½ tsp. cloves
3 bay leaves
1 (5 lb.) boneless pork shoulder roast
1 large yellow onion, quartered
3 cups chicken broth

Directions:
Combine the cider vinegar, lime juice, chipotle chiles, garlic cloves and spices in blender and puree until completely smooth — about a minute or so. Coat pork pieces with the spice mixture and place in the broth. Add the bay leaves and the onion pieces.

Cover and cook on low until the pork is tender, about 9-10 hours. Stir the pork every few hours. When the pork is tender, remove from slow cooker, and shred with two forks. Add about 1 cup of the broth to the meat to keep it moist and flavorful. 

Strain the remainder of the liquid, discarding the bay leaves and onion, and reserve 7 cups for the masa dough. Refrigerate overnight then when the fat is solidified, skim it off of the top and discard.

Dough:

Ingredients:
9 cups masa harina
5 1/4 cups of broth from pork (or chicken broth if you don’t have enough liquid)
4 1/2 tsp. baking powder
2 1/2 tsp. salt
1 1/2 tsp. paprika
1 1/2 tsp. chili powder
1 1/2 tsp. garlic powder
1 ½ cups lard
1 package dried corn husks  (about 75)

Directions:
Soak the corn husks in a large bowl of hot water for 2 hours.
In a large mixing bowl, beat the lard (yes, I said LARD) with a tablespoon of the broth until fluffy and about triple its original size (about 10 minutes). Combine the masa harina, baking powder, and spices; stir into the lard mixture, adding the broth in increments and mix until well incorporated and the mixture feels very fluffy and light. Test by taking a teaspoonful and dropping into a glass of water. It should float. If it falls to the bottom, keep on beating. The consistency should be of soft cookie dough.

Assemble & Steam:

Pat dry softened husks. When filling each husk, place the smooth side facing up from the palm of your hand. Spread 1/3 cup of masa with a large spatula or knife leaving a 2 - 3 inch border on the tapered (bottom) end of the husk. The masa should be evenly spread across the lower 3/4 of the husk leaving about 1 inch on the left side. 

Place 2-3 tablespoons of pork filling in a line along the center of the masa. Make sure to leave 1/2-inch at the top and bottom, and room on the sides for the masa to close around the meat.
Slide a second corn husk under the prepared one facing the opposite direction so that the masa is in the middle of the two tapered ends. 

Carefully roll the tamale, starting with the side covered in masa. Turn right side over to center of filling; fold left side over filling, allowing plain part of husk to wrap around filling.  
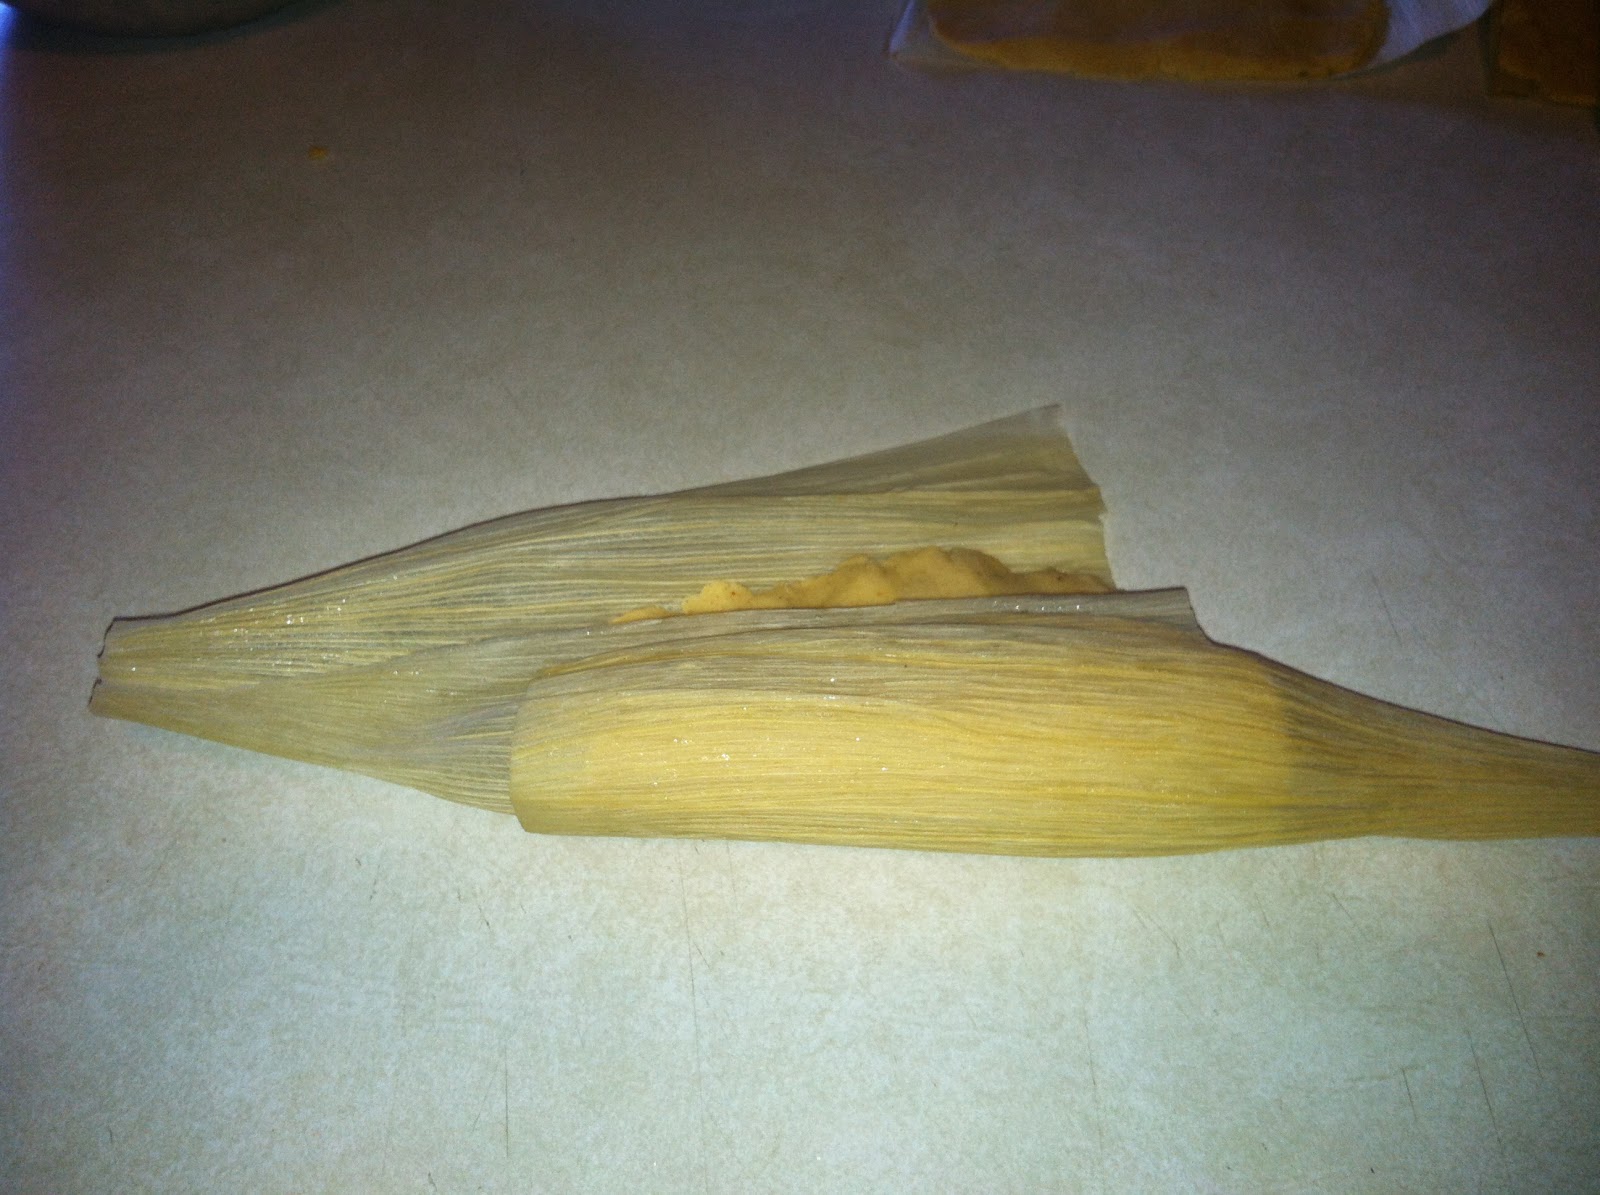
Fold the two tapered ends down and secure by tying the package shut with a thin strip of husk.

Line the bottom of a steamer basket loosely with a few of the husk scraps. 

Stack tamales upright, side by side. For best results, the tamales should be firmly packed, put not too tightly, as the dough needs room to expand some.

Layer some husk scraps atop the tamales to help lock in the steam and add another layer of flavoring. 
Once you have a full pot of assembled tamales, fill the bottom of the steamer pot with water, making sure the bottoms of the tamales are not in the water. Do not let the tamales touch the water or the dough will get soggy.
Cover and bring just to a boil. Steam the tamales for at least 2 hours, adding water as needed so the pot doesn’t go dry.
To test for doneness, carefully take out a tamale from the middle of the basket. Unwrap, the masa should be firm and pull away from husk easily, if not, continue cooking.

Your tamales can be eaten immediately, if you like. But to make them even better, eat them leftover: let them cool completely, then re-steam for about 15 to 20 minutes before serving. This gives you the best texture.

Friday, December 14, 2012

Pick your poison - chocolate/peanut butter or chocolate/mint

Christmas is just around the corner and I have been making treats like crazy this year. There are so many parties and social events to bring things to, it is the perfect excuse to try new recipes. I made two pretty amazing things this week - chocolate peanut butter pie and chocolate peppermint cookies. I love chocolate and peanut butter and I love chocolate and mint so I have a hard time telling you which one is better, solution - make both!

It was my friend, Jason's, birthday this week and he asked for something chocolatey and peanut buttery, I found this recipe (NOT on Pinterest, believe it or not) and I was a little skeptical at first. Based on the ingredients, it looks like it would be way too heavy and rich, but it isn't. It is rather perfect, it got rave reviews and I definitely plan on making it again! Here is the recipe:

Chocolate Peanut Butter Pie


Crust:
2 cups graham cracker crumbs
1/4 cup butter, melted
4 Tbs. sugar

Chocolate Filling:
1 1/3 cups semisweet chocolate chips
2/3 cup whipping cream
2 Tbs. light corn syrup
1 tsp. vanilla

Peanut Butter Filling:
1 cup peanut butter chips
2 Tbs. creamy peanut butter
1 3/4 cups whipping cream
2 Tbs. sugar
1 tsp. vanilla

Topping:
1 cup whipping cream
¼ cup powdered sugar
1 tsp. vanilla
1/3 of chocolate filling mixture
4 Reese’s peanut butter cups

Crust:
Preheat oven to 350°F. Mix graham cracker crumbs and melted butter until well blended. Press mixture into a 9” pie plate. Bake for 8-10 minutes. Refrigerate until cool.

Chocolate Filling:
Combine chocolate chips, whipping cream, corn syrup, and vanilla in microwave-safe bowl. Microwave on medium heat until chocolate softens, about 3 minutes. Whisk until melted and smooth. Spread two thirds of the chocolate mixture over bottom of crust. Freeze 10 minutes.

Peanut Butter Filling:
Microwave peanut butter chips and 3/4 cup cream in large microwave-safe bowl on medium heat at 15-second intervals just until chips soften, stirring often. Whisk in peanut butter and 1 teaspoon vanilla. Cool to barely lukewarm. Beat remaining 1 cup cream and sugar in medium bowl until very thick but not yet holding peaks; fold into peanut butter mixture in 3 additions. Spoon mousse over chocolate layer.

Topping:
In a large bowl, whip cream, powdered sugar, and vanilla until stiff peaks form. Top chilled pie with whipped cream. Drizzle remaining third of chocolate mixture on top of the pie and sprinkle pie with coarsely chopped Reese’s peanut butter cups. Chill at least 1 hour before serving.

Before it was mutilated:


After it was mutilated:


Another annual Christmas tradition is "Christmas Under the Stars". My church hosts it every year and it is a ton of fun. We go to a park and decorate it all up with Christmas lights, we sing Christmas Carols and read the Christmas story then we pretty much gorge ourselves on cookies and hot chocolate. I usually make my mom's sugar cookies at Christmas because it is nostalgic but decorating them is a bit time consuming so I decided to try something quicker. I found this recipe for cookies stuffed with York Peppermint Patties on Pinterest accompanied by this picture:
My mouth started watering right then and there. And I have to say, they taste as amazing as they look. This one is a winner! If you have any cookie exchanges to go to this Christmas season, bring these,  I promise they will impress. 

Chocolate Peppermint Patty Cookies

Ingredients:
3 sticks butter, slightly softened
1 cup granulated sugar
1/2 cup light brown sugar
2 eggs
3 cups flour
1 cup unsweetened cocoa powder
2 tsp. salt
1 tsp. baking soda
24 miniature peppermint patties, frozen
6 oz. white chocolate

Directions:
Beat together butter and sugars until soft and creamy. Add eggs one at a time. In a large bowl sift together all of the dry ingredients. Add to butter/sugar mixture in increments.
Turn out the dough onto a large piece of plastic wrap. Refrigerate until firm, about 1 hour.
Preheat your oven to 350 degrees F. Line 2 large baking sheets with parchment paper. 

Working with approximately 1 tablespoon of dough at a time, use your fingers to evenly encase each of 24 miniature peppermint patties (unwrapped and frozen) with the dough.
Place on the prepared pans and smooth the dough with your fingers, if needed.
Bake until just firm to the touch, about 12 minutes. Remove the pans from the oven and let cool slightly. Transfer the cookies on the parchment to a rack to cool completely.

In a small bowl, microwave 6 ounces of white chocolate chips on high in 30-second bursts until it is creamy and completely smooth when stirred. Using a piping bag, drizzle the white chocolate over the cookies. Let cool completely before serving or storing.

As you can see, I make a lot of cookies for Christmas Under the Stars! I am also bring some to a work Christmas party. 


Saturday, November 17, 2012

Dumb and Cute

So, tonight confirmed for me a well known truth that I have tried ignore for years... girls acting dumb and cute will win points with men. It's a sad truth, but it worked in my favor this evening, acting like a complete ditz got me out of a ticket! A few girlfriends and I went to see the new Twilight move - Breaking Dawn 2. Before I continue on, let me just say that I read the Twilight series when it first came out and loved the books! I still stand by that. It is an entertaining series, but the movies with bad acting, shirtless werewolves, sparkly vampires and ridiculous, screaming teenage fans have made it kind of a joke and now it is just embarrassing to admit to liking it.

So anyway... we were driving to the movie when I suddenly saw red and blue lights spring up behind me. I was getting pulled over and had no idea why. I started to panic, tickets in California are expensive! I pulled over and the cop walked up to my car. He informed me that my tail light was broken and that white light was shining out the side and that it needed to be fixed ASAP. As he examined my licence and registration he asked where we were headed to. I told him we were going to see a movie. "What movie?" he asked. Oh how I wanted to say anything but the truth in this moment. "Um... Twilight." I mumbled in shame as the rest of my passengers were giggling in embarrassment.  "We're all over 30." Darla exclaimed from the back seat. The cop was clearly enjoying my discomfort. He prodded, "How many movies have they made so far?", "Have you seen all of them?" Then Darla chimed in once again, "and she's read all of the books!" Thanks a lot, Darla. My face was bright red at that point and we were all giggling like stupid girls. Just give me my ticket and let me leave already. But, he did not give me a ticket. No, after small talk about Twilight he suggested that I go to Walmart and buy some transparent red tape to put over my tail light so I don't get stopped again and let me go on my way. In fact, he was really nice and kind of flirty. He was charmed by our giggles and excitement to go watch sparkly vampires on the big screen. Part of me wanted to call out, "I know you think this is cute, but I am smart... really." Oh well, I suppose we made his night more entertaining even if it was at the expense of our dignity.

Speaking of Twilight, I will say that Breaking Dawn 2 was the best movie in the series. I thought it was great! I mean, let's be real, it is not going to get nominated for any Oscars or anything, it is still Twilight. But the acting was a hundred times better than the first couple of films and the cinematography was beautiful. Breaking Dawn is kind of twisted (Stephenie Meyer could have finished with Eclipse and I would have been happy) but the movie took the source material and did a great job with it. It could have seemed very creepy but didn't at all. Hats off to Bill Condon. The series is officially over and I can go back to being a normal sane adult that doesn't swoon over teenage vampires. (unless that is your thing, because apparently some guys like that)

Monday, November 5, 2012

I should rename my blog...

... "The things I make from Pinterest". Because seriously, I feel like every post is a recipe or a crafty thing that I have tried. This post is no exception. I have done a few Pinteresty things lately. My friends, Brooke and Charley had a baby last week, a beautiful girl named Emily. I went over this weekend to see her and bring presents and food. Presents and food = Pinterest! Brooke loves cats so I crocheted a kitten hat and 3 little amigurmi kitten toys. I think they turned out pretty cute.


And since I am slightly obsessed with Fall food, I made homemade chicken noodle soup, homemade bread, and caramel apple cider cookies. 

The bread was awesome! It is the easiest thing to make, you don't have to knead it or anything. Just stir the ingredients together, let sit overnight, dump in a pot, and bake. It was crusty on the outside and light on the inside. Perfect! I found a winner of a recipe. Thanks Pinterest!


Crusty Bread

3 cups flour
1 3/4 tsp. salt
1/2 tsp. yeast
1 1/2 cups water

In a large mixing bowl, whisk together flour, salt and yeast.  Add water and mix until a shaggy mixture forms.  Cover bowl with plastic wrap and set aside for 12 - 18 hours.  Overnight works great.  Heat oven to 450 degrees.  When the oven has reached 450 degrees place a pot with an oven safe lid in the oven and heat the pot for 30 minutes.  Meanwhile, pour dough onto a heavily floured surface and shape into a ball.  Cover with plastic wrap and let set while the pot is heating.  Remove hot pot from the oven and drop in the dough.  Cover and return to oven for 30 minutes.  After 30 minutes remove the lid and bake an additional 15 minutes.  Remove bread from oven and place on a cooling rack to cool. DONE!


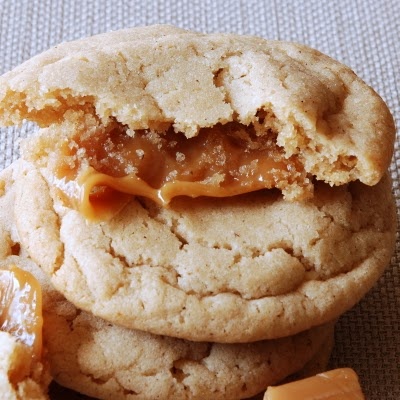
I also found another recipe that looked good for the season - Caramel Apple Cider Cookies. They are very good but the caramel center is very caramely so the texture is pretty chewey. 

Carmel Stuffed Apple Cider Cookies

Ingredients:
1 cup softened butter
1 cup sugar
1/2 tsp. salt
1 box (7.4 oz) Alpine Spiced Apple Cider Instant Original Drink mix
2 eggs
1 tsp. vanilla 
1 tsp. baking soda
1/2 tsp. baking powder
1 tsp. cinnamon
3 cups flour
1 14 oz. bag Caramels 


Preheat oven to 350° F. Line cookie sheets with parchment paper. In a small bowl whisk together flour, baking soda, baking powder and cinnamon. With your mixer (or an energetic spoon) cream together butter, sugar, salt and all 10 packages of apple cider drink mix powder, until light and fluffy. Beat in eggs, one at a time. Add vanilla and mix well. Gradually add flour mixture to butter/egg mixture. Mix until just combined.

Unwrap your caramels. Scoop out cookie dough ball about the size of a walnut. Flatten the ball of dough slightly in the palm of your hand. Press the unwrapped caramel into the center of your dough and seal the dough around it, covering it completely. Place on parchment covered cookie sheets 2 inches apart.

Bake for 12 minutes, or until very lightly browned around the edges. Once the cookies are done, slide the parchment off of the baking sheet right out onto the counter. Allow cookies to partially cool on the parchment. When cookies are cool enough to be firm but still slightly warm, carefully twist off of parchment and allow to finish cooling upside down (either on the parchment or on a rack.) If you forget about them and they cool too much and stick to your parchment, put them into the freezer for a few minutes and they’ll pop right off.


Christmas is coming up and I am inspired to make gifts for my nieces. I think I am going to buy a sewing machine this week (it's about time) and go to town. Yay for Christmas time!